How to update a Queue Deployment from an existing Windows queue
Certain settings can be changed in a Queue Deployment that will be applied to linked print queues without having to update the deployment from an existing print queue. These are standard print queue settings such as the print queue name, share name, location, driver and port settings.
However, driver-specific settings such as the user printing preferences (e.g. default colour/grey scale) can only be copied from an existing print queue. Once they have been copied, all linked print queues will be updated.
So once you have changed driver specific settings on the actual print queue, follow these steps to copy the settings to the Queue Deployment:
- Open Resource Manager and click PDAgents.
- On the right, double click the PDAgent on which the queue is installed (ensure it is online).
- Click the Print Queues tab.
- Double click the print queue from which you would like to update the Queue Deployment.
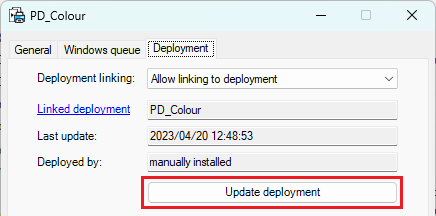
- Click the Deployment tab.
- Ensure the Linked deployment field states that it is linked to a specific deployment. If it states “not linked”, then this queue cannot be used to update the deployment. See How to link a print queue to a Queue Deployment if it is not linked.
- Click the Update deployment button.
- Driver settings, printer properties and user preferences will be copied from this queue. Other settings can be excluded if desired. For example, if this queue has a port setting that you don’t want copied to the deployment, untick Copy ports.

- Click OK and the settings will be copied if a successful connection to the PDAgent is made.
|
Document revision date: 2023/08/25 |
