How to create a monthly colour printing quota for a user
Create a Rule
- Open Resource Manager.
- In the tree view, click Rules.
- On the right hand side, click the Add button.
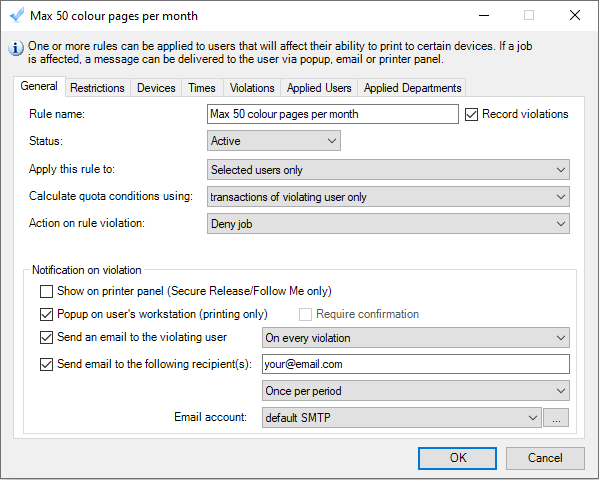
- For the purposes of this example, we will be using a maximum of 50 colour pages. In the Rule name text box, under the General tab, enter Maximum 50 colour pages per month.
- Change the Apply this rule to drop down to Selected users only.
- Change the Calculate quota conditions using drop down to transactions of violating user only.
- Change the Action on rule violation to Deny job.
- In the Notification on violation frame, choose the appropriate method of notifying the user if a violation has occurred:
- If the user has PDAgentClient installed, tick the Popup on user’s workstation (printing only) checkbox (so the user gets an immediate popup on their workstation).
- If the user must get an email when the threshold is met, tick Send an email to the violating user The email address must exist in the user’s record.
- In the adjacent drop down, change the option to On every violation (so the user knows they’ve reached their maximum).
- If you want to get an email when the threshold is met, tick the Send email to the following recipient(s) checkbox and enter your email address.
- In the drop down below your email address, change the option to Once per period (so you only get one email).
- Choose the email account that will be used to send emails.
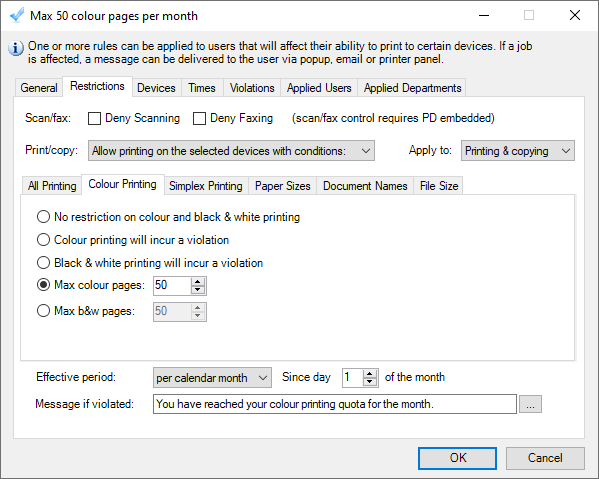
- Click the Restrictions tab.
- Select the Allow printing on the selected devices with conditions from the Print/copy option.
- Click the Colour Printing tab, select the Max colour pages option.
- Enter 50 in the box (or whatever number you would like the maximum to be).
- Change the Effective period drop down to per calendar month.
- Change the Message if violated text to You have reached your colour printing quota for the month (put in whatever message you want the user to see).
- Click the Devices tab.
- Change the option to All devices.
- Click OK.
Apply the Rule to a Department or Departments
Note that applying a Rule to a Department will not affect current members of the Department. It is a New User Default. This means that newly created users that are added to this Department will inherit the Rule. You can apply the Rule to current members by clicking the Go button (see below).
- Open Resource Manager.
- Navigate User Management > Departments.
- On the right, select the department (or multi-select) and click Edit.
- Click the Rules tab.
- Select the Rule(s) that will be the New User Default for the Department. If more than one Department was selected, tick the box to the left of the list of rules to enable it.
- In order to apply this Rule to the current members of the Department, click the Go button in the Current Members frame.
- In order to apply this Rule to the current members of the Department, click the Go button in the Current Members frame.
- Click OK.
Refresh PDServers and PDAgents
Now that a Rule setting has been changed, the PDServers and PDAgents will apply the setting when they next refresh from the database. By default, this happens every 10 minutes. To force a refresh immediately, follow these steps:
- On the left, click the PD Servers node.
- On the right, highlight all the servers. Right click and choose Refresh.
- Now click the PDAgents node.
- On the right, highlight all the servers. Right click and choose Refresh.
|
Document revision date: 2024/07/16 |
