Konica Minolta eSeries Printer Configuration
Before we can install the Print Director applications on the printer, we need to configure the SSL settings in the printer’s web-interface. There is a slight difference in the procedure between the A3 printers (e.g. 227, C368, C654e, etc) and the A4 printers (e.g. C3350).
If you are setting up an A4 printer, please skip to 5. Enable SSL on A4 devices.
1 Login to the Administrator web interface
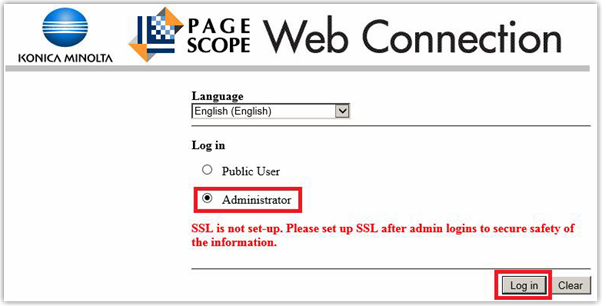
Open a web browser. In the Address Bar, enter the IP of the MFP (e.g. http://192.168.10.10). The following page will be displayed:
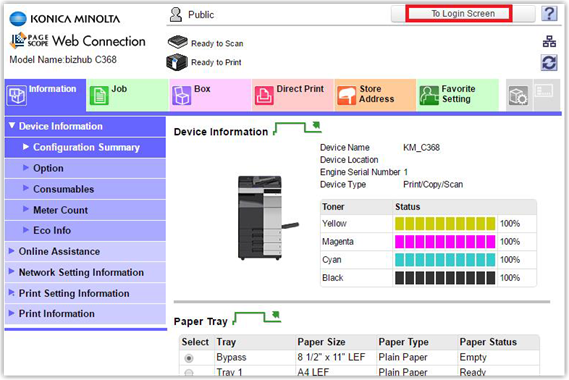
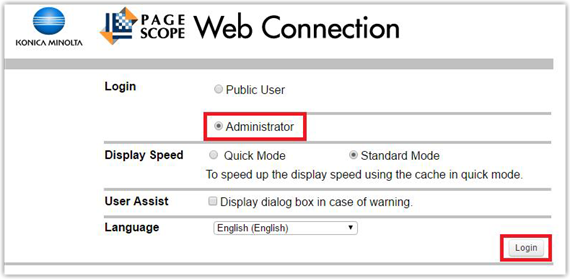
Click the Logout button in order to log back in as the “Administrator” user. Choose the Administrator option and enter the admin password.
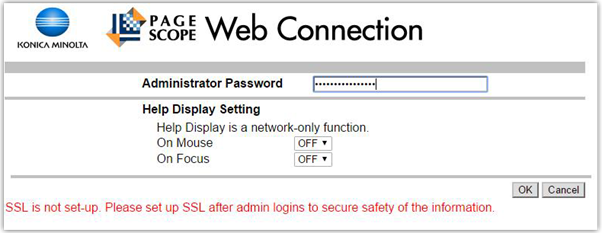
Enter the Administrator password (default is 1234567812345678) and click OK.
2 Check the SSL certificate
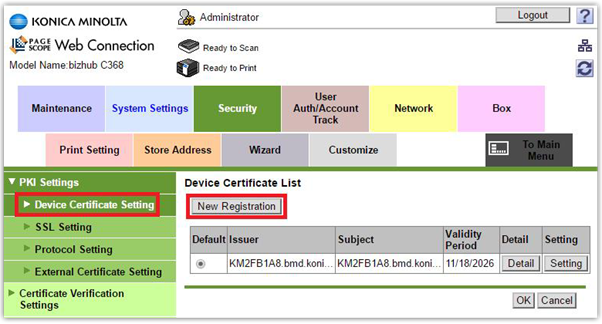
Click Security then under PKI Settings, choose Device Certificate Setting.
On the newer range of devices (e.g. C368) there may be a suitable certificate already installed. If the Validity Period is at least 5 years we can use it and the next section can be skipped. If unsure, create a new certificate.
2.1 Create a self-signed SSL certificate
Skip this section if the pre-installed certificate is to be used.
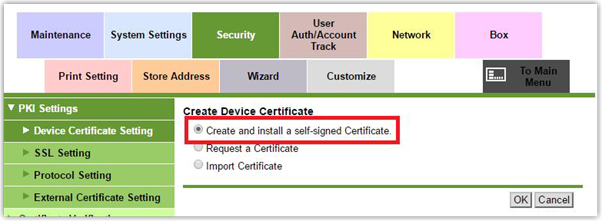
Click New Registration.
Choose Create and install a self-signed Certificate and click OK.
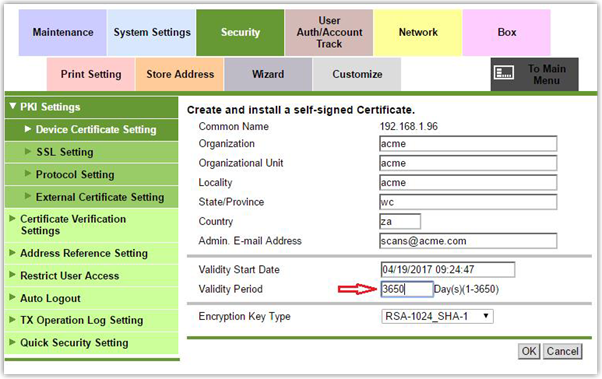
Fill out all the relevant fields. The information entered here is not important except for the Validity Period. Ensure that the Validity Period is set to the maximum 3650.
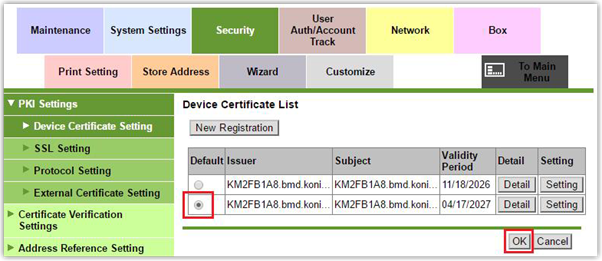
2.2 Ensure the certificate is the default certificate
Once the certificate has been created, choose the newer certificate and click OK as shown below. This will set the newly created certificate as the default.
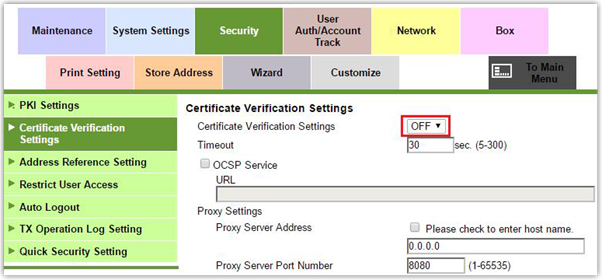
2.3 Disable certificate verification
Now click Certificate Verification Settings and change the setting to OFF and click OK.
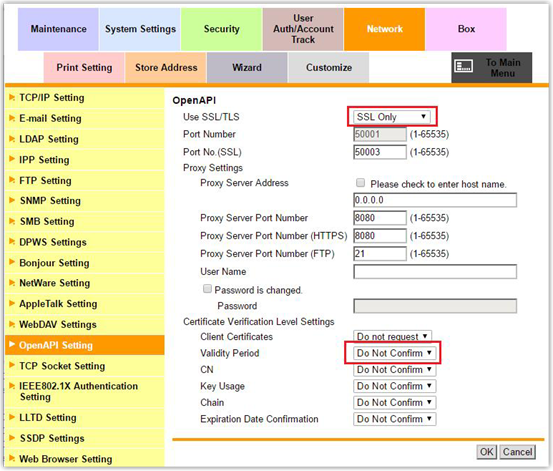
3 Set OpenAPI to SSL Only
Click the Network Settings menu.
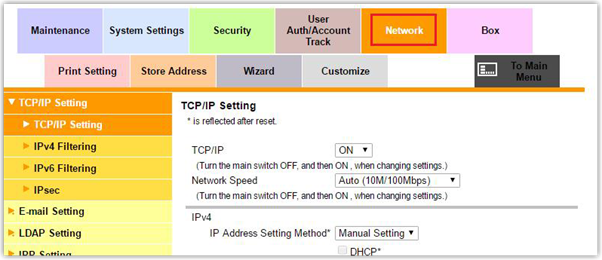
Choose OpenAPI Setting. Change the settings to reflect those selected below.
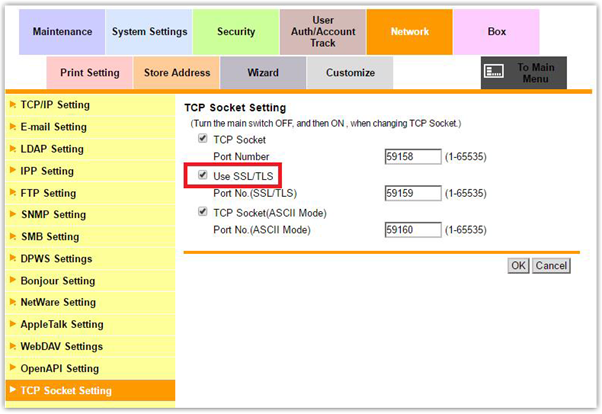
4 Enable Use SSL/TLS on the TCP Socket
Under Network Settings, choose TCP Socket Setting. Tick the checkbox labelled Use SSL/TLS and click OK. You will be prompted to cycle the power on the MFP. This message can be ignored – power cycling is not normally necessary.
Now the MFP is ready to have the Print Director OpenAPI applications installed. Ensure that you have logged out from the admin settings of the web-interface.
5 Enable SSL on A4 devices
This section is for A4 devices only (e.g. C3350).
Open a web browser. In the Address Bar, enter the IP of the MFP (e.g. http://192.168.10.10). Choose the Administrator option and click Log in.
Enter the Administrator password (default is 1234567812345678) and click OK.

5.1 Create a self-signed SSL certificate
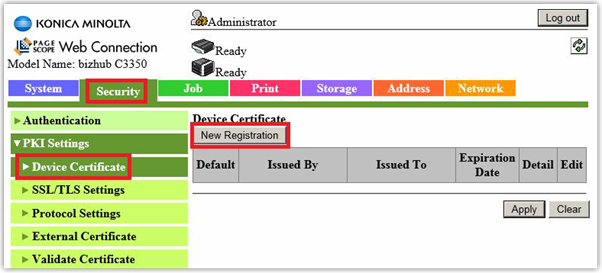
Click Security then under PKI Settings, choose Device Certificate and click New Registration.
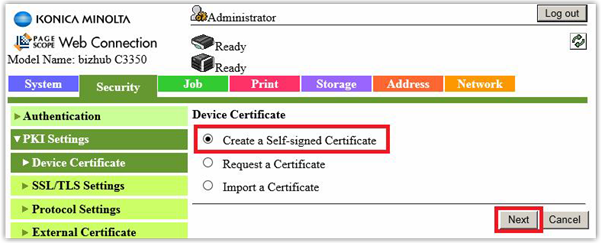
Choose Create a self-signed Certificate and click Next.
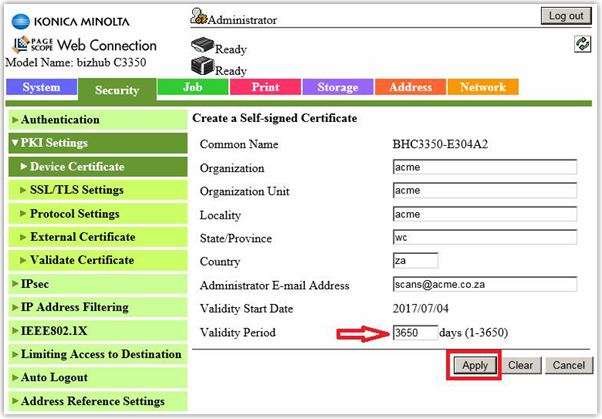
Fill out all the relevant fields. The information entered here is not important except for the Validity Period. Ensure that the Validity Period is set to the maximum 3650.
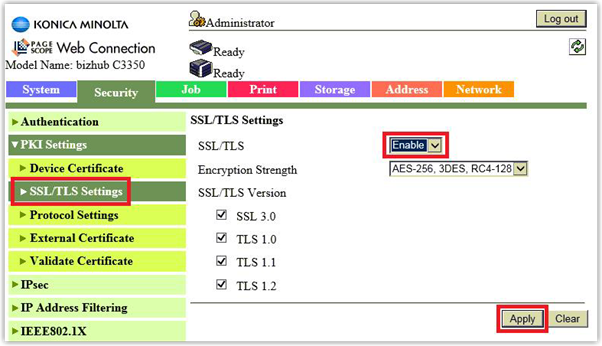
5.2 Set SSL/TLS to Enable
This step is not required on the A3 devices but it is required on the A4 devices. Under PKI Settings, click SSL/TLS Settings. Change the SSL/TLS dropdown to Enable and click Apply.
5.3 Disable certificate verification
Now click Validate Certificate, change the Certificate Verification dropdown to Disable and click Apply.

5.4 Set OpenAPI to SSL Only
Click the Network Settings menu.
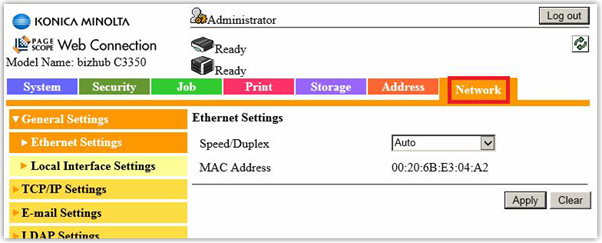
Choose OpenAPI Setting. Change the SSL/TLS dropdown to SSL Only and click Apply.

5.5 Set SSL/TLS to SSL Only on the TCP Socket
Under Network Settings, choose TCP Socket Settings. Change the SSL/TLS dropdown to SSL Only and click Apply. You will be prompted to cycle the power on the MFP. In most cases, this can be ignored. Click Refresh in your browser to enable the Logout button and log out.

You must be logged out of the web-interface in order to configure the device in Resource Manager.
If any problems are experienced when initialising the device, try rebooting the device.
Please follow the steps in the Konica Minolta Setup Guide.
Document revision date: 2024/08/05
