How to show the user account balance on a Konica Minolta printer
This document details how to ensure the user balance is accessible on the LCD panel of a Konica Minolta printer.
Ensure the device is configured to show account balances
- Open Resource Manager.
- Navigate to Print Management > Shared Devices.
- On the right hand side, double click on the printer or right click and select the Edit button.
- Click the Controller tab.
- Click the Initialisation tab.
- Click on the Advanced settings button.
- Ensure the checkbox Don’t show account balance is unticked.

- If a change was made, re-initialise the device and click OK + Refresh All.
Ensure the user’s auto-bill account is set to their user account
- Open the user.
- Click the Billing tab.
- On the Auto-bill account tab, ensure Auto-bill to User Account is selected.
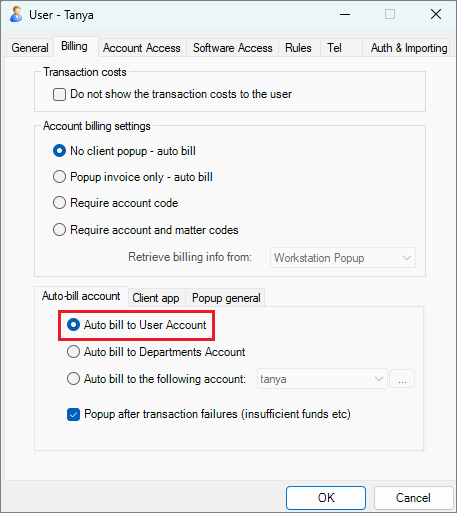
- Click OK.
- If a change was made, the PDServer should be refreshed before testing.
Ensure the user’s account has a minimum balance enforced
- Open the user.
- Ensure the checkbox Enforce minimum balance is ticked.

- Click OK.
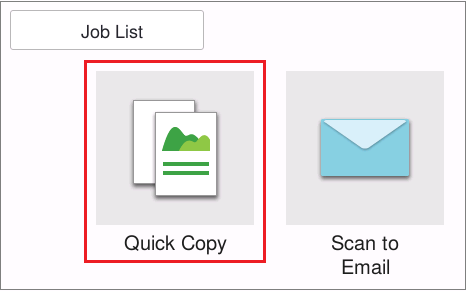
View the balance on the printer panel
- Log in to the printer.
- Touch Quick Copy.
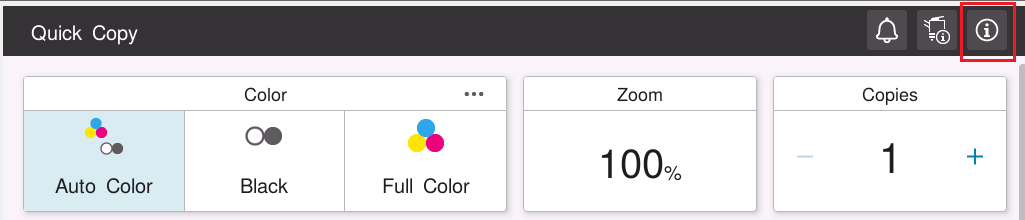
- In the top right of the panel, touch the Information icon:
- The current balance will be displayed:

- Once the machine starts copying, the balance will be updated as each page is printed:

|
Document revision date: 2024/04/19 |
