Group Policy Deployment of PDAgent
Document objectives
This document provides a brief outline on how to configure the deployment of PDAgent via Active Directory Group Policy.
Insert the database settings into the PDAgent msi file
When Group Policy deploys the PDAgent msi file, the software will be installed on the users’ workstations. However, without knowing the database connection settings, it won’t be able to connect to the database. In order to solve this problem, the msi file used for the deployment must contain the database connection settings relevant for that site. To do this, follow these steps:
- Open Resource Manager.
- In the menu bar, choose Tools > Add database settings to msi file.
- Navigate to where the PDAgentInstaller.msi file is saved and click Open.
- A message will be displayed stating whether inserting the settings was successful.
Choose a distribution point for the msi file
Now that the PDAgentInstaller.msi contains the database connection settings, it must be moved to a folder on a server (preferably the Active Directory server) that is shared with read access for the user group to which it will be deployed (e.g. Everyone or Domain users). It is also sometimes necessary to add the Domain Computers security group to the read access permissions of the shared folder.
Create a Group Policy Object (GPO) and link it to an Organisational Unit (OU)
Now that the msi file is saved in a valid distribution point, we need to create the GPO that will deploy it. Firstly, we need to choose the OU that contains the Computer Objects on which the software must be installed. Once that decision has been made, we can create and link the GPO:
- Open Control Panel > Administrative Tools > Group Policy Management.
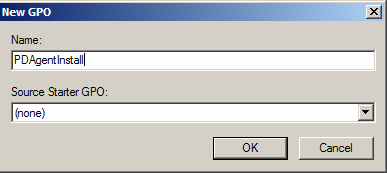
- Choose the OU which contains the Computer Objects which will receive the installation. Right click it and choose Create a GPO in this domain, and Link it here… (below is an example).

- Give the new GPO a descriptive name.
- Now that the GPO has been created and linked to the OU we need to edit it. Right click on the GPO and choose Edit:

- Now the Group Policy Management Editor will open. Navigate to Computer Configuration > Policies > Software Settings > Software installation.
- Right click in the right hand pane and choose New > Package…
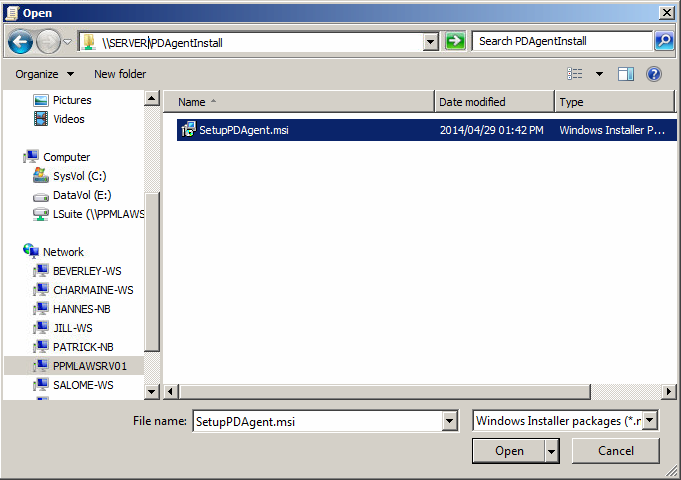
- Now a browse dialogue will open in order to choose the msi file. It is important that the network path is used (e.g. \\server\sharedfolder) and not the local path (e.g. C:\SharedFolder). To do this, click in the address bar of the Open dialogue and enter the path to the shared folder similar to the following example:
- Choose the deployment method Assigned and click OK.

Now that the software installation package has been defined, the GPO will be applied the next time the computers within the OU are rebooted. Note that Win XP clients may require two reboots before the policy is applied.
| Document revision date: 2023/08/25 |
