Windows: Set user default to black and white
Set the “Gray Scale” default for the print queue
- On the user’s PC, open Control Panel and then Devices and Printers.
- Right click the print queue and choose Printer Properties (note: not Properties).

- On the General tab, choose Preferences.
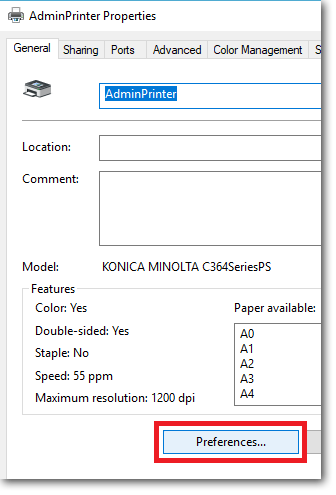
- The procedure here will be different between printer manufacturers. This example uses a Konica Minolta C364e driver. Click the Quality tab.
- Change the Select Color dropdown to Gray Scale.

- Click OK.
Now when the user prints, their jobs will be black and white.
To print specific jobs in colour
If the user needs to print a specific job in colour, they can change it in the print dialog box when they print. An example appears below. This may be different for other driver types. This example uses a Konica Minolta C364e driver print from Word:
- When printing, click the Printer Properties link.

- Click the Quality tab.
- Change the Select Color dropdown to Auto Color.

- Click OK.
- Click Print.
The job should now be printed in colour.
|
Document revision date: 2022/06/21 |
