How to create a comma separated file containing users
A Users Export flat file can be used for importing into other systems. The fields required can be added, removed or re-ordered as needed. Also, the delimiter can be customised if required.
Create a Flat File Export
- Open PDReports.
- Navigate to Flat File Exports > Users Export.
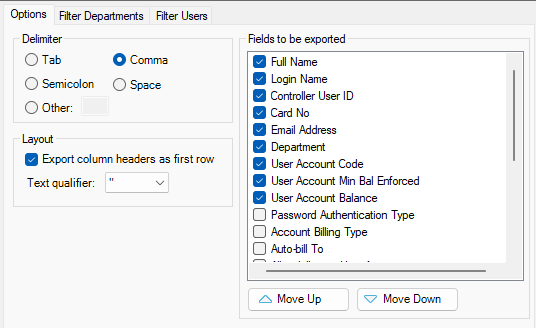
- On the Options tab, choose the delimiter. In this example, we will be using Comma. The delimiter is the character that is used to separate each line of data into columns.
- In the Layout frame, tick the Export column headers as first row checkbox and choose the Text qualifier (leave as double inverted commas).
- In the Fields to be exported, tick all the fields you would like in your report. You can move the headings up or down by selecting the heading and clicking on the Move Up or Move Down buttons.
- If you would like only a subset of users exported, click on the Filter Departments tab.
- Tick the Filter departments checkbox.
- Tick the departments containing the users you would like exported.
- Tick the Filter departments checkbox.
- Click Run Export.
- Save your file.
View the output in Excel
If the file was saved as a Comma Separated File (.csv) then normally Excel is the default application associated with the file extension (.csv). This means that when the file is opened, Excel will likely auto-format the data into columns and change the columns formats. The problem with this is that if a column contains only numeric data (e.g. the Controller User ID or PIN number), it will change the column data type to Number. This means that if a user’s PIN is 00123, it will only show 123 in the cell which is incorrect.
To avoid Excel auto-formatting columns into Number data type, follow these steps:
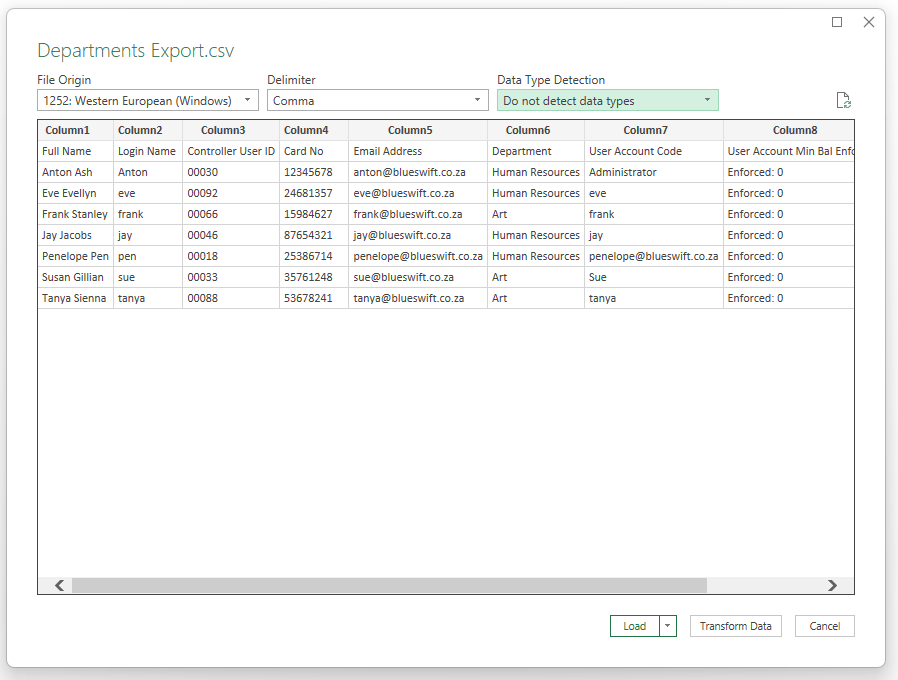
- Open Excel (without double clicking the file).
- Choose a Blank workbook in the templates window.
- Click on the DATA ribbon, then From Text/CSV.
- In the Import Data dialog, browse to where the file is saved. Select it and click Import.
- In the Import dialog, leave the Delimiter option that was chosen when exporting (in our example, it is Comma).
- Click on the Data Type Detection dropdown and select Do not detect data types.
- Click Load.
|
Document revision date: 2024/07/12 |
