Use Standard TCP/IP port with LPR to send a different username
Normally when the PDAgent’s LPD service receives a job, it uses the username contained in the LPR header to authenticate the user. Most operating systems will insert the user’s account name into this field. However, there may be situations where you would want to authenticate the job as a different user. Perhaps a user has a device that is not part of the domain. Their local user account could be just ‘User’ and you wouldn’t want jobs to be authenticated at the server as ‘User’.
Instead of renaming their account on their PC, you could create a local print queue with an LPR port that will send jobs to the PDAgent with a different username. You wouldn’t need to install the PDAgent on the local PC (unless they are using billing popups) if the queue will be sending jobs to a PDAgent on another machine (i.e. the print server). This would also work even if you aren’t using a print server at all. In this case, the PDAgent would need to be installed locally.
Ensure the LPD service is enabled on the PDAgent
Firstly, we must ensure the LPD service is enabled on the PDAgent that will be receiving the jobs (i.e. the print server, or the local PC in serverless environments):
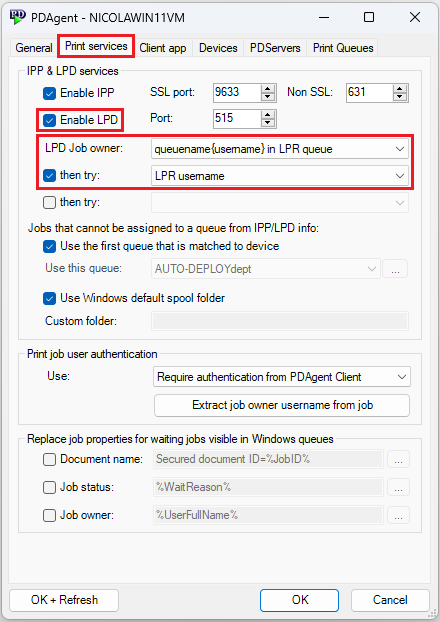
In Resource Manager, click PDAgents and then double click the PDAgent on the right. Click the Print services tab. Ensure the Enable LPD checkbox is ticked and change the LPD Job Owner settings to reflect the example below. Then click OK + Refresh.
Ensure a print queue exists that is matched to a device
When the PDAgent receives a job from LPR, it needs to know which print queue it should use for the job’s processing (i.e. the device settings for the queue’s Matched Device and whether to send to the device’s main network adapter or the Fiery adapter if it has one). First it will try to match a queue using the Queue field it receives from LPR. If it can’t match a queue it will simply use the first queue it can find that is matched to a device.
Ensure a record for the user exists
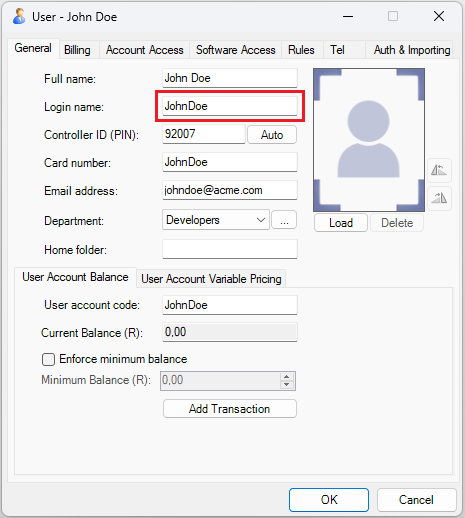
In this example, we have a user with their own Windows device named John Doe. We can create a user record in Resource Manager by navigating to User Management, Users and clicking the Add button. We fill out the user settings and allocate them a PIN number by clicking the Auto button. Note that we’ve set their Logon code to be JohnDoe without spaces. This will be used when we create the print queue on their PC.
Create the print queue on the user’s device
Now we can go ahead and create the queue on their device.
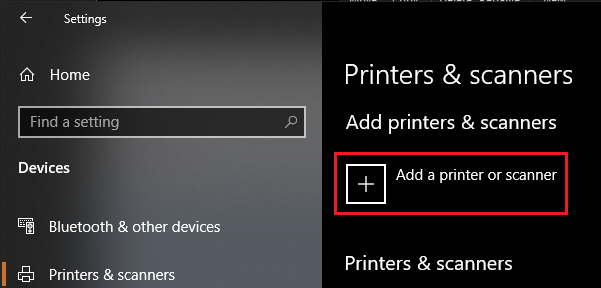
In Windows 10, go to the Settings app, Devices then Printers and scanners. Click Add a printer or scanner.
It will begin searching for printers on the network. Once the search completes, click The printer that I want isn’t listed.

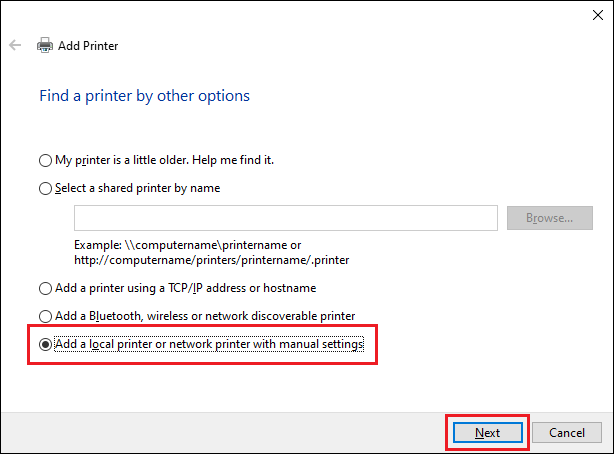
Now the Add Printer dialog will open. Choose Add a local printer or network printer with manual settings and click Next.
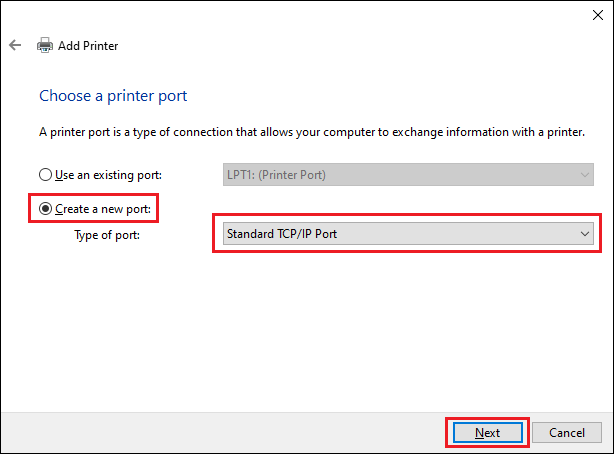
In the Choose a printer port form, select the Create a new port option, and choose Standard TCP/IP Port. Then click Next.
In the next form, enter the IP address of the server if using a print server (not the IP of the printer). In a serverless environment, with the PDAgent installed locally, enter 127.0.0.1.

Now Windows will try to detect the port settings. Because the IP we entered is not an actual printer, we will need to wait until it times out before we can manually enter the correct settings.
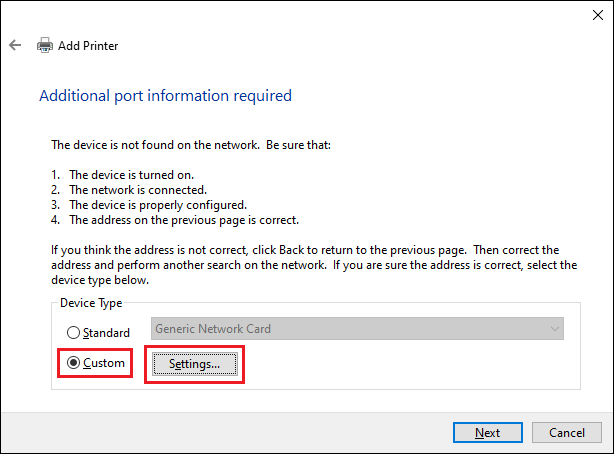
When the next form is displayed, choose Custom and click the Settings button.
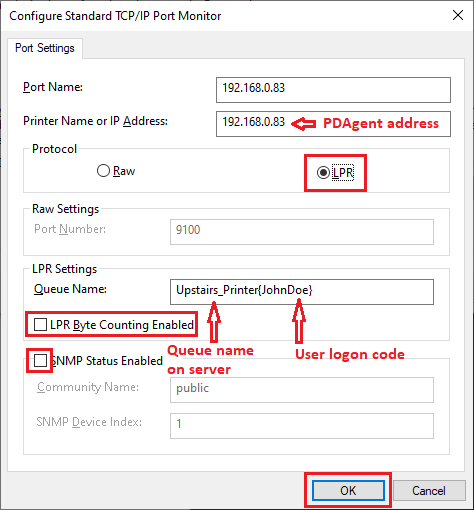
In the Configure Standard TCP/IP Port Monitor form, we change the following settings:
- Set the Protocol option to LPR.
- Set the Queue Name to the name of the queue on the PDAgent followed by the user logon code in curly brackets {}. Note that no spaces are allowed. In our case, the queue on the server is Upstairs Printer so we put an underscore in for the space: Upstairs_Printer{JohnDoe}.
- Untick the LPR Byte Counting Enabled checkbox.
- Untick the SNMP Status Enabled checkbox.
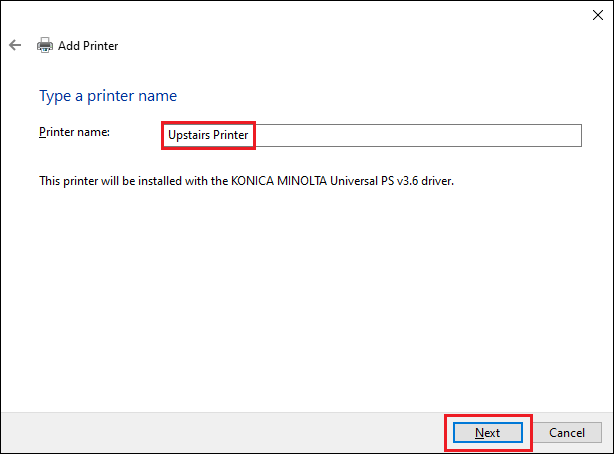
Click OK and then Next. On the next form, choose the correct driver or click Have disk button to choose the driver files you have saved. Click Next and enter a name for the printer.
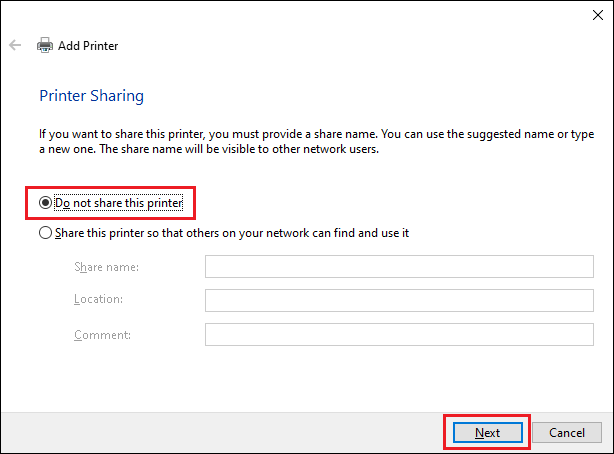
Then click Next to install the printer. On the last form, choose Do not share this printer and click Next.
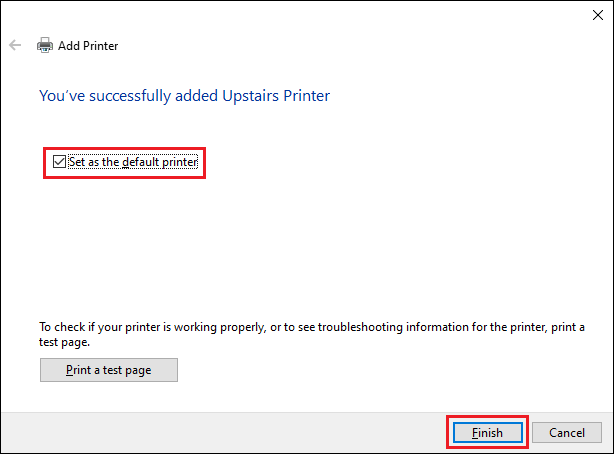
Now click Finish on the last form (choosing Set as the default printer if you like).
Recommended config setting for Konica Minolta drivers
Now that the printer has been created, there is a config setting that we recommend for Konica Minolta drivers. Without changing this setting, the user may notice a delay when printing from certain applications. It might appear that the application has frozen for a few seconds after they complete the print workflow. On Konica Minolta drivers, this happens because the driver is attempting to do a status check of the physical printer using the port information to connect. It will do this even if the Auto obtain settings is disabled.
To remedy this problem, open the Printer Properties for the queue, click the Configure tab and click the Obtain Settings button.
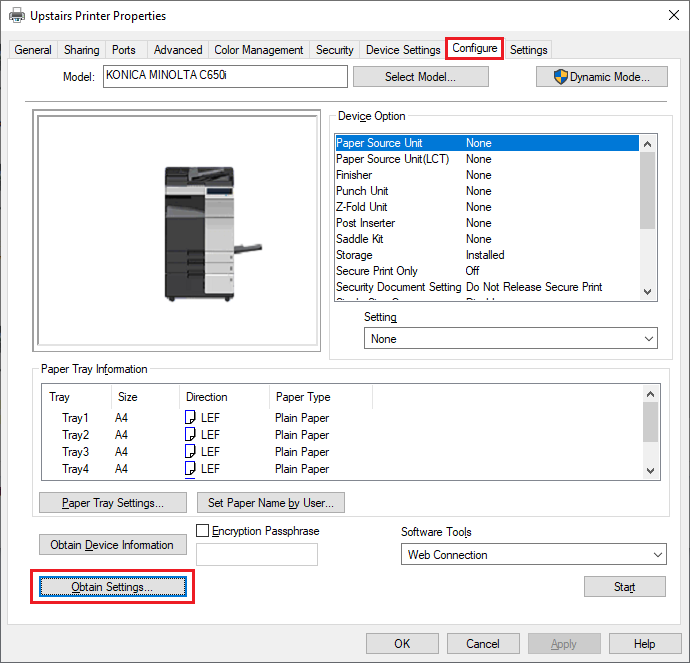
In the Obtain Settings form, untick the Auto checkbox. Choose the Specify IP Address or Printer Name option. Then enter the IP of the printer in the box. This can be the IP address of any printer that is online most of the time.

Now click OK and OK again to close the Printer Properties.
Perform a test print
Send a test print to the queue to confirm that it is working as it should. If the device is configured for Secure Release, check that the job is available for release:
- Open Resource Manager and click PDAgents.
- Right click the PDAgent on the right and choose View Print Jobs.
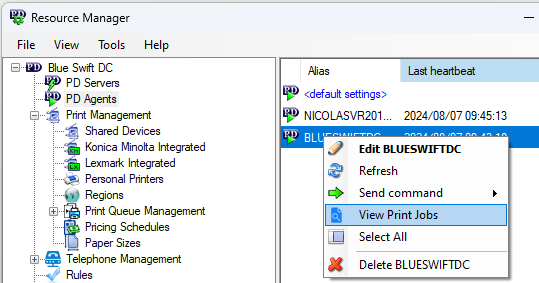
- Ensure the user’s job appears in the list under the correct username:

Ask the user to release the job at the printer to confirm all is working as it should.
|
Document revision date: 2024/08/07
|
