

How to set up IPPS on HP printers
How to set up IPPS on HP printers
This guide enables and confirms the device-side settings an HP printer needs before Print Director can deliver print jobs to it over IPPS (IPP secured with TLS): the IPP service, the secure port and resource path, and the TLS versions. Once these are confirmed, configure Print Director itself by following How to deliver print jobs securely with IPPS, entering the port and path found here.
HP FutureSmart devices serve IPPS through the same secure web server that hosts the Embedded Web Server, presenting the device’s TLS certificate. Windows itself prints to these devices over IPPS with its built-in IPP Class Driver, which is a quick confirmation that the endpoint is live.
Step 1: Enable IPPS on the device
-
Log in to the printer’s Embedded Web Server as an administrator.
-
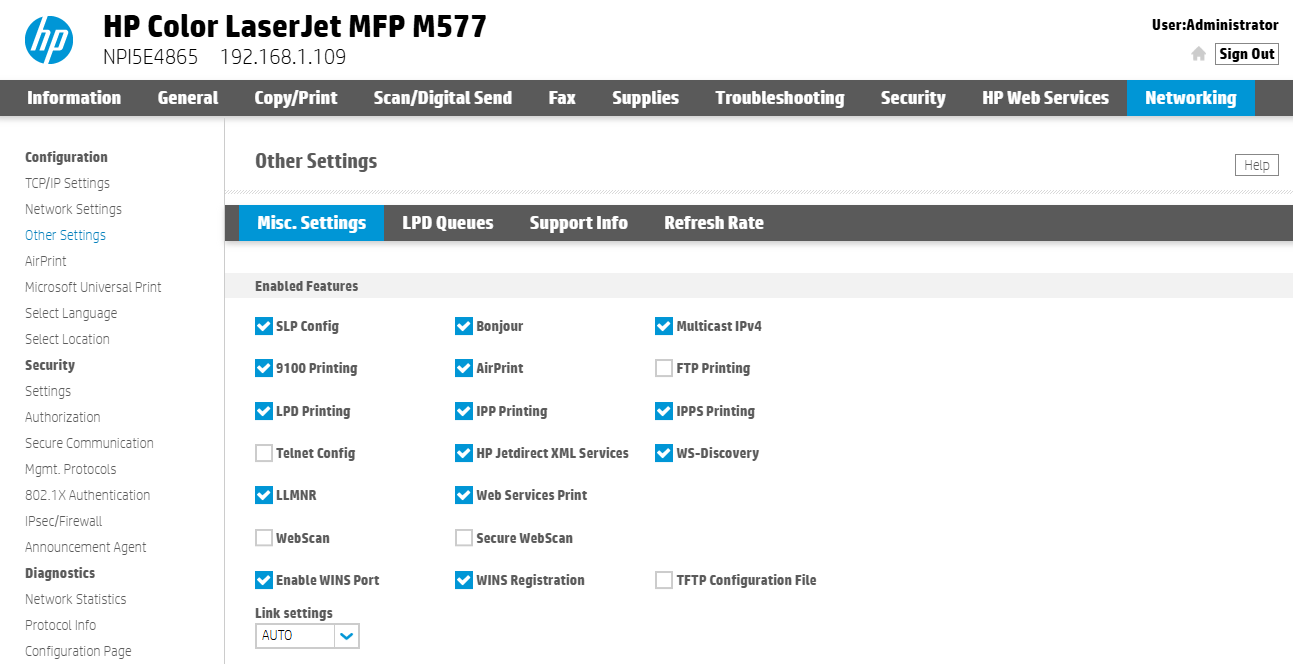
Open Networking > Other Settings, then the Misc. Settings tab.
-
Under Enabled Features, ensure IPPS Printing is checked and apply the settings.
Step 2: Confirm the port and path
On HP devices, IPPS is normally served on the device’s HTTPS port, TCP 443, with the resource path ipp/print. Some models also accept IPPS on TCP 631, the standard IPP port. Start with 443; if a test print fails with a connection or TLS handshake error, try 631.
So the values to enter in the shared device’s Network category in Resource Manager are port 443 (or 631 if 443 does not work) with path ipp/print and Use TLS (IPPS) ticked.
Step 3: Confirm TLS 1.2 or 1.3 is enabled
Print Director negotiates whatever TLS versions the Windows server running the PDAgent supports, which on current Windows is TLS 1.2 and 1.3. In the EWS under the security settings (Networking > Management Protocols > Network Security on FutureSmart devices), make sure at least TLS 1.2 is enabled. Current firmware enables it by default.
The certificate IPPS presents is the device’s TLS certificate, managed under the EWS certificate settings. With Print Director’s recommended Pin certificate on first use trust policy the factory self-signed certificate works; with CA-signed certificates only, the device must hold a CA-issued certificate first.
Optional: Require authentication for IPP
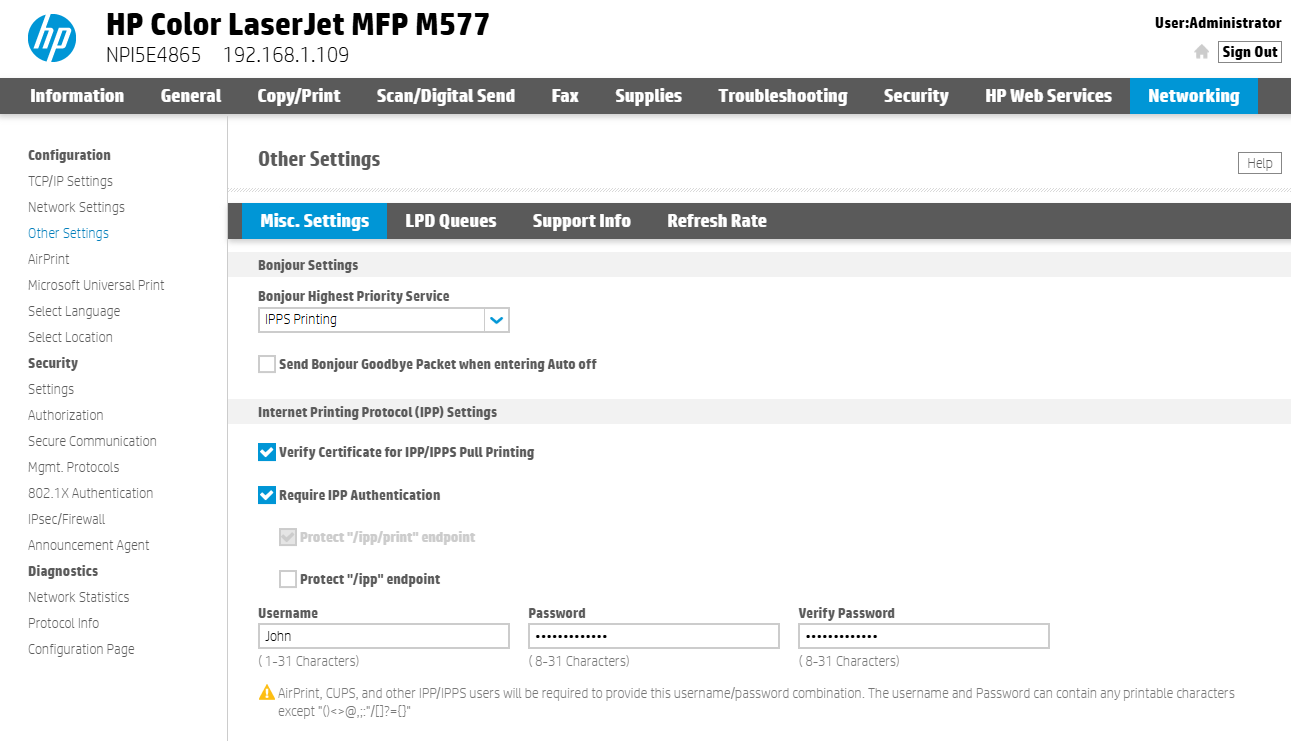
To require a username and password, stay on Networking > Other Settings > Misc. Settings and scroll down to Internet Printing Protocol (IPP) Settings:
- Check Require IPP Authentication. In the captured configuration, Protect “/ipp/print” endpoint is checked and greyed out.
- Enter the Username, Password and Verify Password, then apply the settings.
- Enter the same credentials in the shared device’s Network category in Resource Manager.
The general authentication flow is Step 4 of How to deliver print jobs securely with IPPS.
Related
- How to deliver print jobs securely with IPPS: the Print Director side, including the port settings, certificate trust policy and authentication.
| Document revision date: 2026/10/23 Software version: 2.5.15.3 |