

How to set up IPPS on Lexmark printers
How to set up IPPS on Lexmark printers
This guide confirms the device-side settings a Lexmark printer needs before Print Director can deliver print jobs to it over IPPS (IPP secured with TLS): which port serves IPPS, the resource path, and the TLS versions. It then covers the optional printer-side account setup for authenticated delivery. The Print Director side (switching the device to IPPS in Resource Manager, the certificate trust policy, and entering credentials) is in How to deliver print jobs securely with IPPS.
The short version
On a Lexmark printer:
- IPPS port: 443 (the device’s HTTPS port), not 631.
- Path:
ipp/print(the same endpoint the device uses for AirPrint). - Plaintext IPP listens on 631; sending TLS to 631 fails with a handshake error.
- For authenticated delivery, the device’s Browser login method must be a Username/Password method.
Step 1: Confirm the ports on the device
-
In the printer’s Embedded Web Server go to Settings > Network/Ports, expand TCP/IP, and open TCP/IP Port Access.
-
Read the list. You will typically see TCP 631 (IPP) open and TCP 443 (HTTPS) open, and there is no separate “IPPS” port entry. That is expected: on Lexmark, IPPS is served through the HTTPS server on 443, at the path
/ipp/print. Make sure TCP 443 (HTTPS) is open.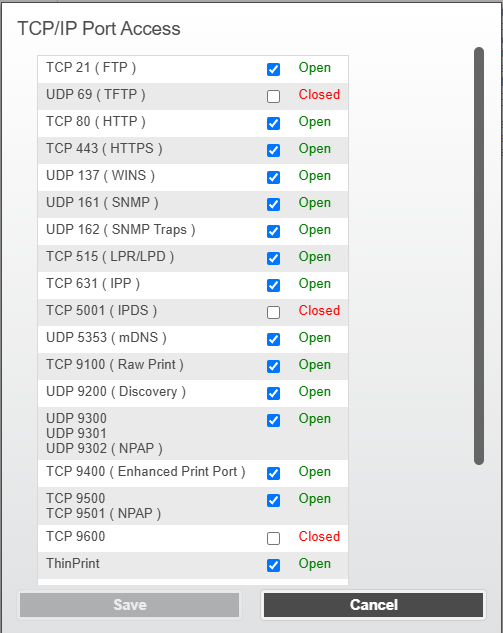
So the values to enter in the shared device’s Network category in Resource Manager are port 443 with path ipp/print and Use TLS (IPPS) ticked. Port 631 is plaintext IPP only: if Print Director is pointed at 631 with TLS enabled, the printer answers the TLS handshake in plaintext and delivery fails with “handshake failed due to an unexpected packet format”.
This same list is where you close TCP 515 (LPR/LPD) and TCP 9100 (Raw Print) once IPPS delivery is verified.
Step 2: Confirm TLS 1.2 or 1.3 is enabled
Print Director negotiates whatever TLS versions the Windows server running the PDServer or PDAgent supports, which on current Windows is TLS 1.2 and 1.3.
- Go to Settings > Network/Ports > TCP/IP > TLS Support.
- Make sure at least TLS 1.2 is enabled. Current Lexmark firmware enables 1.2 and 1.3 by default, so this only needs attention if the device has been restricted to TLS 1.0/1.1.
Steps 1 and 2 are all a device needs for encrypted, anonymous IPPS delivery. Continue with Step 2 of How to deliver print jobs securely with IPPS to switch the device over in Resource Manager.
Optional: Create a printer account for authenticated IPPS
Create a dedicated permission group before creating the account. This lets you remove Internet Printing Protocol (IPP), B/W Print and Color Print from Public while retaining those permissions for authenticated IPP printing.
Without an additional permission group, a new account belongs only to All Users, which has the same permissions as Public in this setup. Creating a username and password alone does not give the account the print rights removed from Public.
You can assign the account to Admin, but that gives it broader permissions. The dedicated IPP Printing group below limits the additional permissions to IPP printing.
1. Create the permission group
-
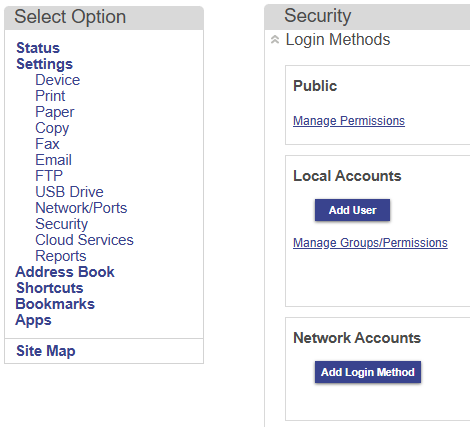
Go to Settings > Security > Login Methods. Under Local Accounts, click Manage Groups/Permissions.
-
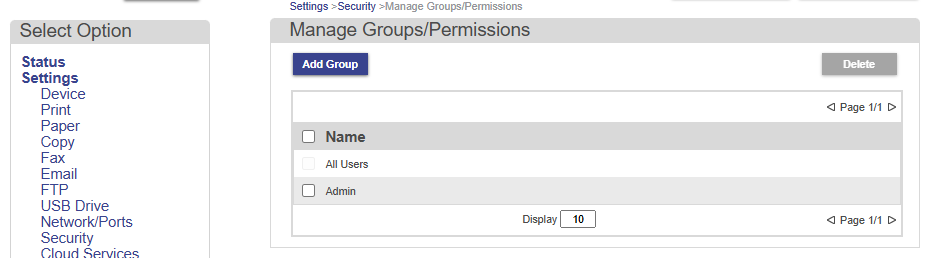
Click Add Group.
-
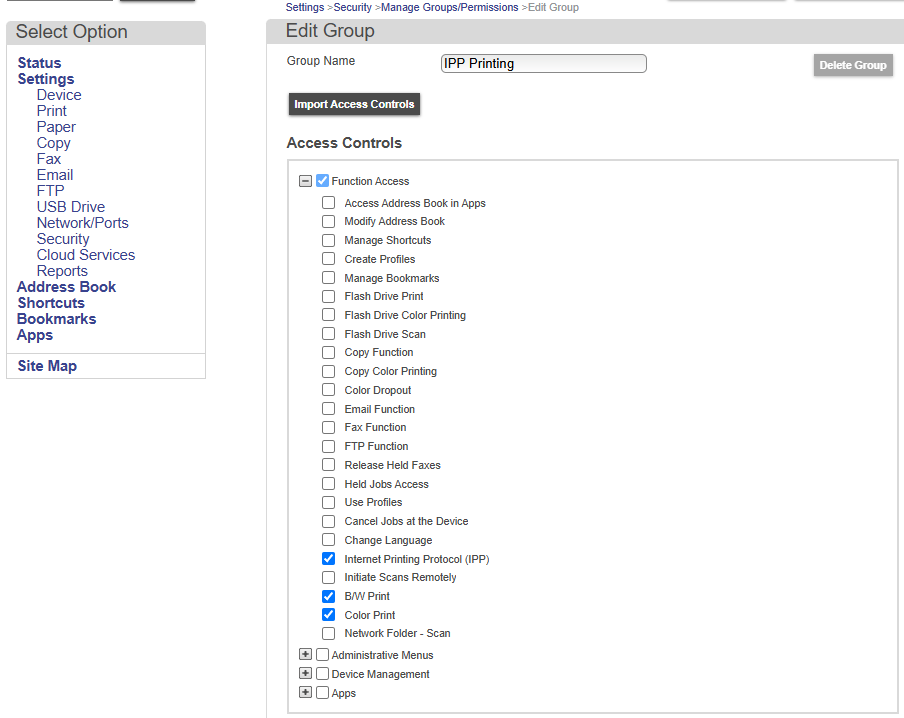
Give the group a name, for example IPP Printing. Under Function Access, check Internet Printing Protocol (IPP), B/W Print and Color Print. Leave unrelated permissions unchecked.
-
Click Save.
2. Create the account and assign its group
-
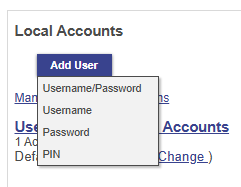
Return to Settings > Security > Login Methods > Local Accounts, click Add User, and choose Username/Password. The other local account types are Username, Password and PIN; select Username/Password for this setup.
-
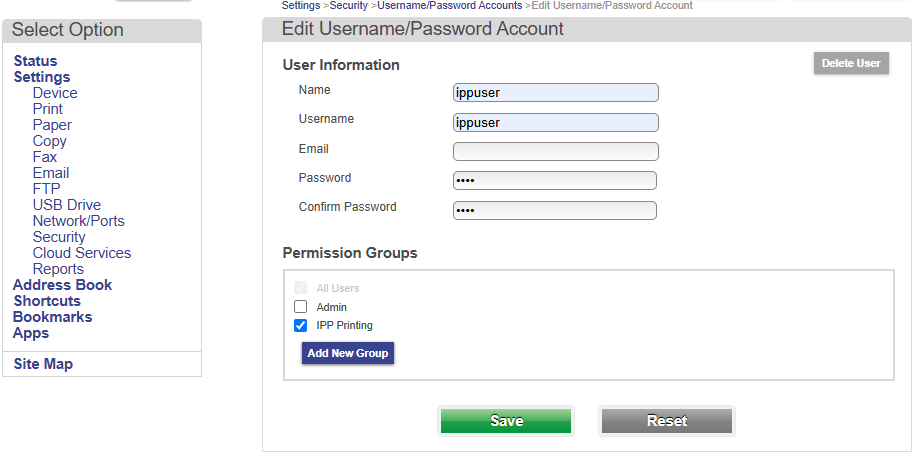
Enter the account details, using a username such as ippuser and a strong password.
-
Under Permission Groups, select IPP Printing, then click Save. All Users remains selected automatically; the additional group grants the required print permissions.
3. Check both default login methods
Creating the first local user can change the default Control Panel login method to Username/Password. After creating the account, open the default login methods using Change beside the defaults on Settings > Security > Login Methods and check both:
- Control Panel: set to Print Director Auth, so the printer panel continues using Print Director authentication.
- Browser: set to Username/Password. If only Username/Password accounts exist, this will already be selected. If there are also PIN, Username-only or Password-only accounts, explicitly check that the Browser default is Username/Password.
Save any changes.
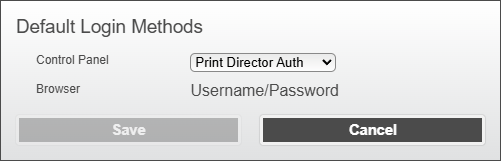
The IPP endpoint authenticates HTTP Basic against the Browser default login method. An interactive browser login can offer a choice of methods, but IPP uses the single default. A different Browser default prevents the IPP username/password login from working, even when the credentials work through the interactive login page.
4. Restrict Public and verify delivery
-
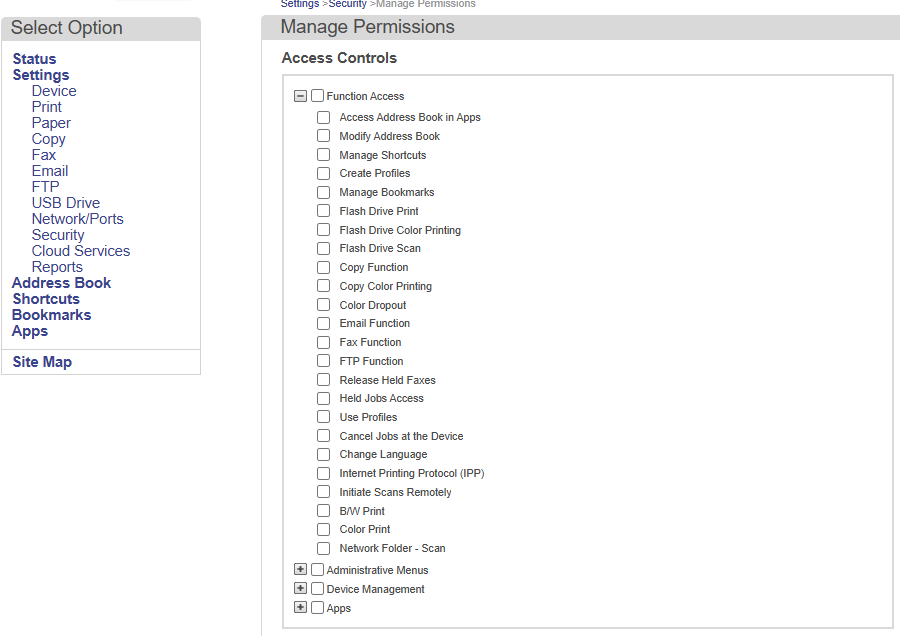
Go to Settings > Security > Login Methods > Public > Manage Permissions > Function Access and untick Internet Printing Protocol (IPP) so unauthenticated IPP requests are refused. If Public has already been restricted as described in How to harden the security of Lexmark printers, this may already be done.
-
Enter the account credentials in the shared device’s Network category in Resource Manager, as described in Step 4 of How to deliver print jobs securely with IPPS, and send a test job.
-
Once authenticated delivery works, remove B/W Print and Color Print from Public if they are still enabled, then test again. The IPP Printing group retains those permissions for ippuser.
If delivery fails with “IPP authentication failed (HTTP 401)”, check that the Browser default is Username/Password, then re-check the credentials. Also confirm that the account belongs to IPP Printing and that the group has all three required permissions.
Related
- How to deliver print jobs securely with IPPS: the Print Director side, including the port settings, certificate trust policy and credentials.
- How to harden the security of Lexmark printers: the admin account, the minimum Public permissions, and SNMP v3.
- Lexmark print permissions for delivered jobs: why anonymous RAW/LPR/IPP jobs run under the Public user’s permissions.
| Document revision date: 2026/10/23 Software version: 2.5.15.3 |